Bring the Moon to Your Desk with a Smart Display
Most people rarely pause to consider the Moon's gradual illumination cycle, but a clever project by Karsten Mueller lets you keep our celestial neighbor in sight at all times. By combining a circular display, an ESP32-S3 microcontroller, and a 3D-printed case, this device offers more than a simple moon phase indicator. It calculates the Moon's appearance based on your exact local time, latitude, and longitude, showing what the Moon would look like even when it's hidden below the horizon or faint in the daytime sky. The result is a realistic, dynamic desktop companion that connects you to the night sky.
What is the "Put the Moon on Your Desk" project?
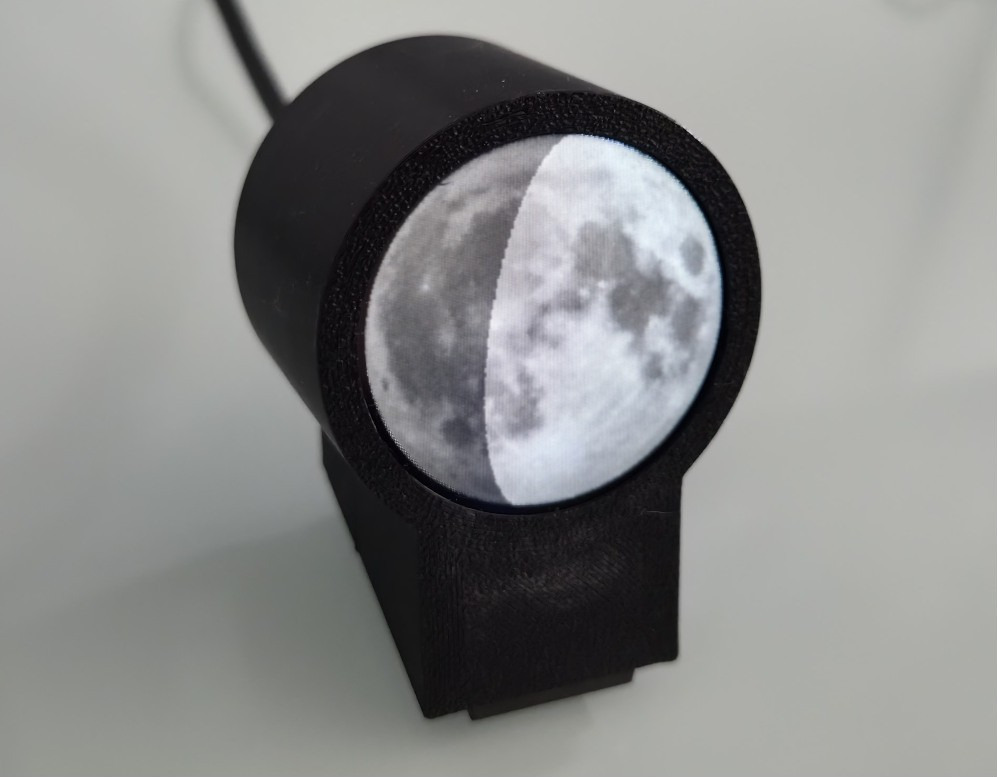
This project, created by Karsten Mueller, is a desktop device that displays a miniature representation of the Moon as it appears from your specific location on Earth. Unlike generic lunar phase calendars, it factors in your local time, latitude, and longitude to produce an image that approximates what the Moon actually looks like at that moment—even if you cannot see it due to daylight or the Earth's shadow. The initial concept was documented in German, but an English translation is available on Hackaday.io. The device uses a circular screen, an ESP32-S3 microcontroller, and a simple 3D printed case. The software is the real innovation: it renders the Moon's phase, orientation, and position with high accuracy, offering a personalized view of our nearest neighbor.
How does the device display the moon accurately?
The accuracy comes from the software's ability to calculate the Moon's appearance based on your local time and geographic coordinates. By entering your latitude and longitude, the device determines the Moon's altitude, azimuth, and phase in real time. It then renders an image that shows the illuminated portion of the Moon exactly as it would appear if you looked up—taking into account the Moon's tilt and orientation from your viewpoint. This means the display shows the correct crescent orientation, the terminator line (the boundary between day and night on the Moon), and even the effect of libration, which causes the Moon to wobble slightly. The result is a highly realistic, location‑specific lunar portrait that updates continuously throughout the day.
What hardware components are used in the device?
The hardware is elegantly simple. The core is an ESP32‑S3 microcontroller, which provides Wi‑Fi connectivity and enough processing power to run the lunar rendering algorithms. The display is a circular LCD or OLED screen that shows the Moon image. All components are housed in a custom 3D‑printed case that gives the device a clean, modern look. The setup requires no external sensors—the ESP32‑S3 pulls time data from the internet and uses the pre‑entered latitude and longitude to compute the Moon's appearance. Assembly is straightforward for anyone comfortable with basic electronics and 3D printing. The project's GitHub repository includes the case design files and wiring instructions.
How does the software work to show the correct moon phase and appearance?
The software takes your local time (via NTP) and geographic coordinates (latitude and longitude) as inputs. Using astronomical algorithms (similar to those used in planetarium apps), it calculates the Moon's position relative to the Sun and Earth. The key outputs are the lunar phase (percentage illuminated), the altitude above the horizon, and the orientation (which side is up from your perspective). The device then renders an image of the Moon, applying a realistic texture and shading to show the correct illuminated area. The result is not just a simple phase icon but a view that matches what you would see if you could look at the Moon at that moment, even if it's below the horizon. The software also handles the Moon's libration and the slight variations in its orbit.

Where does the moon imagery come from?
Initially, Karsten Mueller used a photograph he personally snapped of the Moon as the base texture for the display. However, the project also supports an alternative source: pulling high‑resolution imagery directly from NASA. These NASA images provide a more detailed and scientifically accurate representation of the lunar surface. The software then processes the chosen image—whether Karsten's photo or NASA data—and overlays the calculated shadow pattern to show the correct phase. Users can select their preferred source in the configuration. This flexibility makes the device both personal and precise, offering a custom look while maintaining astronomical accuracy.
Where can I find the project details and source code?
All project resources are publicly available. The original write‑up is in German, but an English page is hosted on Hackaday.io for international readers. The full source code, 3D‑printable case files, and hardware assembly instructions are shared on GitHub. Interested makers can clone the repository, order the electronic components, and print the case themselves. The Hackaday.io page includes a step‑by‑step guide, wiring diagrams, and tips for calibration. Whether you are a seasoned hardware hacker or a curious beginner, the project is designed to be accessible and rewarding.
Related Articles
- 5 Sports Cars That Defy Depreciation: Better Than a Toyota Corolla?
- How to Choose Between Vibe Coding and Spec-Driven Development: A Step-by-Step Guide
- How to Uncover a Prehistoric Giant: A Step-by-Step Guide to Discovering the Longest-Necked Dinosaur in Southeast Asia
- Rust 1.95.0: Streamlined Configuration and Enhanced Pattern Matching
- How to Honor a Loved One and Sustain the Communities That Matter
- Wireless Titans Forge Unprecedented Satellite Alliance to Crush Network Dead Zones
- 6 Game-Changing Insights About Fin Operator: The AI Agent That Manages Your AI Agent
- How to Expose Hidden IT Problems and Eliminate Digital Friction